Blog · Acrylic laser cutting
Acrylic is one of the most popular materials for laser cutting in signage, displays, interiors and brand activations. This guide explains thickness limits, flame-polished edges, design rules, tolerances and file preparation so your parts are production ready.
Why acrylic laser cuts beautifully on CO2 lasers
Acrylic absorbs the CO2 laser wavelength very efficiently. Instead of tearing or chipping like some plastics, it melts and re-solidifies in a controlled way, leaving smooth, glossy edges that look flame-polished straight off the bed.
Key advantages
- Clean, polished edges without sanding or buffing.
- Fine detail and tight internal radii are possible.
- No tool pressure or vibration on delicate parts.
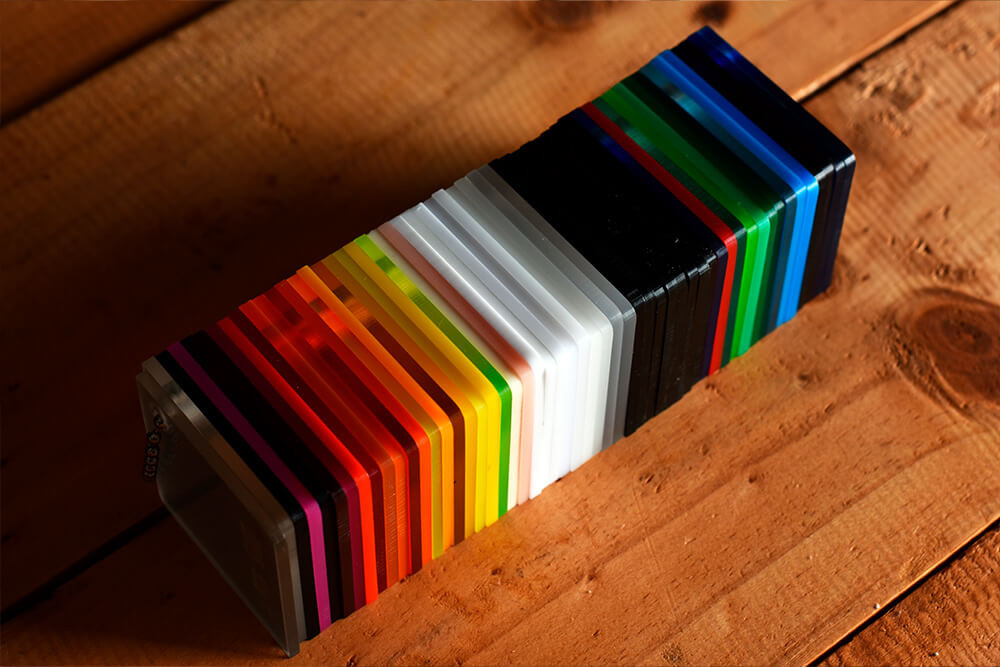
Common acrylic types
- Cast acrylic – the best choice for laser cutting.
- Extruded acrylic – workable but less consistent.
- Clear, opal, black, white and solid colours.
Typical uses
- Shopfront and internal signage.
- Retail displays and fixtures.
- Architectural features and partitions.
Acrylic thickness and sheet size limits
Thickness affects cut quality, edge appearance and job time. As parts get thicker, feed rates slow down and the beam has to work harder to maintain a clean edge.
- Typical sheet sizes: 1220 x 2440 mm and 1500 x 2000 mm.
- Maximum flat bed size: 1500 x 3000 mm.
- Most signage and display jobs sit between 3 mm and 10 mm thick.
- Thicker panels (12–20 mm) are common for structural display components.
- CO2 laser cutting up to around 30 mm is possible on suitable jobs, but requires sensible design.
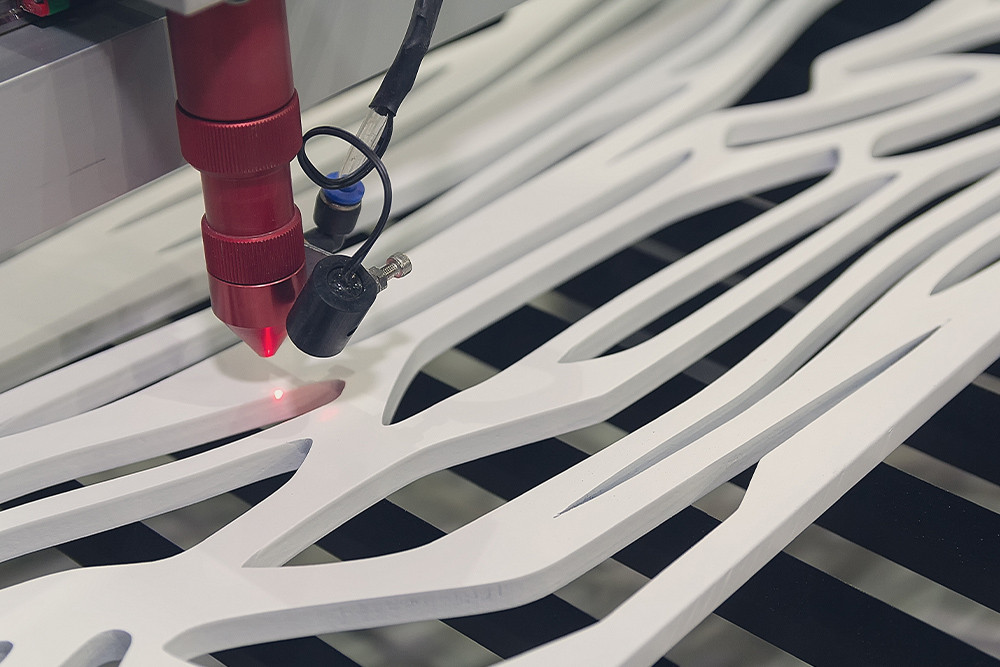
Flame-polished edge finish – what to expect
One of the big reasons people choose acrylic is the edge. On clear material especially, a CO2 laser cut edge looks like it has been polished with a flame or buffing wheel, but it happens automatically during the cut.
Benefits of laser edges
- High-end appearance straight off the machine.
- No secondary polishing on most jobs.
- Consistent edge finish across large batches.
When edges need extra care
- Very thick acrylic can show subtle vertical striations.
- Sharp internal corners may appear slightly softened.
- Certain colours and extruded grades can behave differently to cast clear.
Cast vs extruded acrylic – visual comparison
When you are aiming for the best possible edge quality and stability, cast acrylic is usually the safer choice. A simple side-by-side visual makes the difference obvious.
Cast acrylic – smooth, clear edge with minimal striations and stable behaviour during cutting.
Extruded acrylic – still usable, but more prone to small surface imperfections and variation between batches.
Design rules and tolerances for acrylic parts
Acrylic is accurate but brittle. Designing with the material in mind helps avoid cracking, stress points and unnecessary rework.
Minimum feature recommendations
- Minimum hole diameter roughly equal to material thickness.
- Avoid slots narrower than the sheet thickness where possible.
- Use internal radii instead of perfectly sharp internal corners.
Practical tolerances
- General laser tolerance: around ±0.1–0.3 mm depending on thickness and part size.
- Larger panels may move slightly as residual stresses relax.
- Call out only truly critical dimensions to avoid over-specifying.
Cut-out text, stencil requirements and engraving
Acrylic letters and logos are a core use case for CO2 laser cutting. Whether you are cutting through or engraving, a few rules keep everything legible and robust.
Cut-out acrylic text
- Convert all fonts to outlines/curves before export.
- Use stencil-safe fonts or add bridges for letters like A, O, P, R and B.
- Avoid ultra-fine serifs or hairline elements that can become fragile.
Engraving and etching
- Place engraving lines on a clearly named etch layer in your DXF.
- Supply logos and artwork as vector files rather than low-res bitmaps.
- For reverse-engraved panels (back-etched and viewed through the face), mirror artwork where required.
File preparation checklist for acrylic laser cutting
Good files reduce setup time, minimise questions and lower the risk of rework. Before you send artwork, run through this quick checklist.
- Work in millimetres; confirm a known dimension measures correctly.
- Use closed polylines for all cut shapes; remove stray lines and duplicates.
- Separate cut and etch operations onto clearly named layers.
- Convert text to outlines when it is part of the cut geometry.
- Include material type (cast or extruded), colour, thickness and quantity in your notes.
- Provide a reference PDF for complex jobs or multi-layer signage.
Where acrylic laser cutting shines
Acrylic is the default choice when you want a crisp, premium look with clean light transmission and sharp edges.
Signage and branding
- 3D letters and logo sets for shopfronts.
- Lightbox faces, push-through letters and inserts.
- Wayfinding, amenity and directory signage.
Displays, interiors and events
- Retail display plinths, risers and product supports.
- Exhibition and event props, panels and lettering.
- Architectural panels and decorative elements.
Acrylic laser cutting – FAQs
Laser Cutting Experts runs CO2 laser systems specifically set up for acrylic and other display plastics, alongside fiber laser, CNC router and digital knife equipment. That means acrylic letters, logos, lightbox faces and architectural panels can be produced alongside metal brackets, timber panels and foam inserts as one integrated project rather than separate jobs spread across multiple suppliers.
When you are specifying acrylic laser cutting, the critical decisions are material type (cast versus extruded), thickness, colour and how the parts will be mounted or lit. From there, a handful of sensible design rules on minimum feature sizes, hole diameters, internal radii and stencil bridges will keep parts strong, legible and easy to install. Clean DXF files, realistic tolerances and clear notes about which edges or faces are visible all help keep costs predictable and lead times under control.
Based in Sydney and servicing the East Coast of Australia, Laser Cutting Experts supports everything from one-off acrylic prototypes through to national signage and retail roll-outs. If you are planning a project and want to know whether your current artwork and material choices are suitable for laser cutting, send the files through and we can provide practical feedback rather than guesswork.